Teen Bedrooms

Image

 “As I opened the door…I had to force myself to take a deep breath.”

                                  If you have teens, this is a normal response when you open the door to their rooms. LOL

My kids have been told from day one, “It’s ok to make a mess as long as you clean it up.”

No problem right?  Well, some days are easier than others. Especially when I didn’t know my kids had so much stuff.

LOL So, how do we help them help themselves?

After doing a little research I have fond some tips that could help!!!

                                                                            ~PRAY~ PRAY~ PRAY~Image

  • First of all make sure that all members are on board.  Let your teens and family know that you all are going to try something NEW.
  • Make sure that everyone knows what is expected and decides on what “A CLEAN ROOM,” means.  Get all opinions and make a final decision.
  • Set up goals-like once a week, monthly, and seasonal.
  • Create a list of rewards and consequences.  Teens are encouraged to help with this list. Once gathered keep them close to remember.
  • Show each other how to do what is needed, help when needed, and then let everyone do their part.
  • Leave room for negotiation but do not take advantage of each other.  RESPECT!
  • Remember that the mess is not as important as the relationship!
  • Know that there will be moments of frustration or things won’t get done. But encourage one another with praise towards what is done and can be done.  Help each other especially if there is a need or unexpected situations arise.

Remember that we all have to start somewhere and it’s ok to make a mess as long as we clean it up.

Below is a BASIC list of steps that can help ANY Teen clean their Bedrooms!

Start with a list of areas that are worst—than check off as you go.  This will help everyone to feel great about their accomplishments.


Girls – Concentrate on purpose and meaning.Image

      Guys – Concentrate on simplicity and organization.Teen Guy Room

  1. Energetic Music-put on your favorite music a little loud.  Makes you feel excited!
  2. Open windows- (at least your blinds) Light and fresh air will help you get started.
  3. Strip the beds-put the dirty linens away and put clean linens on, then go ahead and make your bed. What a great way to start for your end of the day.
  4. Clean out from under your bed, dressers, desk, and other areas that need attention.
  5. Clean off dressers, night stands, bookshelves, and desks. Polish and put back only what is needed.  Place items where they belong and re-organize if needed.
  6. Take anything that does not belong to your room and put them where they belong.
  7. Hang and put away clean clothes, shoes, and any other accessories.
  8. Remove any trash, dirty dishes, dirty laundry etc…
  9. Remove anything that is left on the floor or put those items where they belong.
  10.  Sweep and/or vacuum room.

Spray a little air freshener of your choice….DONE!!! Congratulations!!!
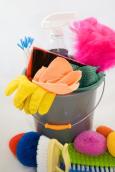
ImageFor a deeper clean, add these steps.

  • Dump each drawer that is in your room one at a time. Declutter then Re-organize.
  • Clean out closet. Declutter and then Re-organize.
  • Sweep corners and walls for cobwebs.
  • Dust light fixtures, vents, ceiling fans, blinds, and nicknacks.
  • Clean light switches, door handles, and any mirrors.
  • Clean windows inside and out.

Declutter-get rid of things that are trash, not needed, broken, no longer age appropriate or not in the right space. Only keep things that are needed or necessary for immediate future use.

Organize-after you declutter, start with a clean area. Keep things that are logical for your needs.  Put them in places by where you use often and things you don’t use often. Or arrange by necessity and function.

  •   For Seasonal: try re-arranging the room for a different look-feel.

 Now that your room looks and smells great how can we keep it up?

 Easy!!!   Keep things simple-Put things back asap-once a week pickup!

Image

Again, we will have messes and things will pile up but we can have a cleaner and more organized room if we do a little every day.  Then when we need to really clean we have the basics to have “less stress from cleaning the mess.”

Enjoy your kiddos…mess and all!!!


Emergency Kits

Emergency:

When preparing for a possible emergency situation, it’s best to think first about the basics of survival: Fresh water, Food, Clean air, and Warmth.

Recommend items to include in a Basic Emergency Supply kit:

Water-one gallon of water per person per day for at least 3 days. (Drinking & Sanitation)

Food-at least a 3 day supply of non perishable food; Infant formula if needed.

Personal toiletries including feminine hygiene

Can opener for food; plastic trash bags with ties, hand sanitizer, diapers if needed

Battery powered or hand crank radio and a NOAA Weather radio with tone; extra batteries for each

Flash light(s) one per family at least with 2 sets of batteries for each flashlight: may also want to consider a crack flashlight as well.

First Aid Kit with First Aid book and All Prescription Medicines; glasses and other items necessary

Whistle and Flares to signal for help

Map of local areas etc…

Cash

Additional Items that can be considered in an Emergency Supply Kit:

If you have pets you will want to include the same amount of food, water & medications, for each pet.

Family documents: Copies of Insurance Policies, Bank Account, Passports or Identification records, Marriage & Birth certificates, Medical information, and any other documents necessary. May take photos of everything yearly to keep up for Insurance if damages occur. Keep in fireproof, waterproof, and portable container.

Travelers Checks…Change for toll ways or payphones.

Blankets, Sleeping bags, or bedding –especially in colder places.

Complete change of clothing for each member of the family: Include long sleeve, shot sleeve, long pants, socks, and sturdy shoes.

Non Scented Bleach.  When diluted can be used as a disinfectant or water treatment.

Fire extinguisher.

Matches, lighters, candles, sterno’s, in a waterproof container.

Paper plates, cups, utensils, paper towels, toilet paper.

Paper, pens, pencils and permanent marker.

Disposable cameras to take photos of damage as documentation.

Sunscreen, insect repellant and hats if possible.

Utility tools: assorted knives, screwdriver, hammer and axe.

Fix a flat

Sentimental Items: (Some people want to pack these along with the survival items.)

Bible

Photos Albums and Videos

Etc….

NOTE: Protect all items from water and other environmental elements. Store items inside plastic bags inside the kit and then make sure the kit is waterproof as much as possible. Store the kit in a clean and dry area that is easy to access in an Emergency!

Remember that in a true disaster or emergency all these items are great but YOUR LIFE is the most important!

For more information:

www.ready.gov

www.redcross.org

Basic First Aid for the Home or on the Go

1 box small adhesive strip bandages

1 box large adhesive strip bandages

2 box nonstick sterile gauze bandages–assorted sizes

1 sterile bandage tape

Safety pins

Disposable latex gloves

Scissors

Tweezers

Eye wash/eye cup

Small splints

Burn ointment

Antiseptic spray/lotion/wipes

Aspirin

Ibuprofen

Tylenol

Anti-diarrheatic medication

Calamine lotion/hydrocortisone cream

Thermometer

Gel cold pack

Emergency Contact information of each family member with phone numbers

First Aid guide

Quarters/Cash

Basic First Aid

DISCLAIMER:

I am not a Doctor so if you have an emergency please seek professional help.

This is just a BASIC FIRST AID SUPPLY list that comes in handy for the “Uh Oh, Ouch” moments!

Suggestion:  One kit in each car, one kit in each bathroom, one kit in any traveling unit.

· Alcohol or antiseptic wound wipes

· Antiseptic/anesthetic spray (like Bactine)

· Ace bandage

· Adhesive tape (cloth) 1″ thickness

· Antibiotic ointment for cuts and scrapes

· Aspirin or similar anti-inflammatory pain reliever

· Assorted non-stick adhesive bandages

· Burn cream or aloe vera based gel for minor burns

· Calamine lotion or hydrocortisone cream for the “itchy scratches”

· Cotton balls and swabs

· Eye wash kit

· Instant cold pack

· Insect bite/sting stick

· Scissors

· Smelling salts

· Sterile gauze pads for large wounds

· Tweezers

ADDED EXTRAS:

· CPR instruction card

· Disposable latex gloves

· EpiPen or similar epinephrine auto-injector for severe allergic (anaphylactic) reaction

· First aid guide-book

· Hand sanitizer

· Wet wipes
Once a year check all kits and make sure everything is up today.

  1.  Make a list of whats inside for inventory. (Change as needed)
  2. Throw away any product with an old expiration date or soon-to-expire date.
  3.  Re-supply items needed or low.
  4. Keep a card in the kit with all medicine allergies for each affected family member.

Now you are ready for any minor BOO BOO’s!

EMERGENCIES!!!!!

When experiencing one of the following conditions, call 911 immediately:

This is certainly not an exhaustive list. It’s important to understand that emergencies are defined by the victim; if you feel you are having a medical emergency, call 911 immediately.

May God protect you and Keep you Safe while having FUN!

7 Day Spring Cleaning Challenge – Day 6

Outdoor is just as rewarding as the indoor when it comes to Deep Cleaning!

Here are some recommendations:

  • Clean out your gutters.
  • Examine all exterior for damages. Wiring, windows, piping, paneling, decking, patio furniture etc…make a list and have items repaired right away. Small fixes now can save you a major expense or major damage.
  • Clean patio furniture and chairs.
  • Remove old potting plants, dead leaves and items that need to be trashed. Replace with new plants that are colorful, especially the entrance.
  • Weed front and back yard.  Fertilize with a weed and feed and then water yard.
  • Add fresh mulch to flowerbeds, tree areas and shrubs.
  • Trim trees, bushes and shrubbery.
  • Replace light bulbs or outside light sources.
  • Clean or replace doormats.
  • Clean any glass that you can reach. Allow the sun in!
  • Clean out your garbage cans, birdbaths, grills etc…
  • Sweep entrances, driveways and sidewalks.
  • Hand a current décor on your door or place in your yard.
  • Clean out your cars. Wash and wax for a maximum clean.
  •  For those that have a pool, or hot tub, or a pond, or other places, clean as usual.

Make some tea and brownies and enjoy the outdoors!

7 Day Spring Cleaning Challenge – Day 5

Did you know that your home is full of missions?  Well it is…Lets see…

There is The Den, The Study, The Family Room, The Media Room, The Game Room and don’t for get the Extra Bedroom.

They all have one mission…to ENTERTAIN!

They all have one basic way to Deep Clean!

Here is your mission to Deep Clean: Clear the clutter, remove the messes, bust the dust, get rid of any grime/trash and unwanted, then end with a shine to the furniture.

If you chose to accept this Mission…here are your instructions for a successful Deep Clean!


  • Discard unwanted magazines, newspapers, junk mail, in the trash.
  • Remove any cups, dishes, and other items that belong in the kitchen.
  • Cleanout from ALL FURNITURE and remove from room.
  • Find home for items that are piling up or on the floor.  Toys, movies, blankets, plants, games and controllers, books, and items that don’t belong in that room.
  • Dust picture frames, lamps, lights, ceiling fans, vases, decorations on shelves, equipment and all other things that collect dust. May want to de clutter things that have no purpose or value.
  • Dust all Furniture.
  • Polish all couches or vacuum couches and chairs.  Shake Pillows outside. Wash all blankets, dry, fold, and replace where needed.
  • Vacuum behind couched, window sills, drapes, color coverings, and baseboards.
  • Erase smudge marks and fingerprints from wall and light switches.
  • Change air filters and clean vents.
  • Look around for items that are still not in place or cleaned and complete.
  • Once everything is back into place, go to the next room and complete. One room at a time is best!
  • Burn a candle that has a tropical or fruity scent. It’s very pleasant and makes the room complete.


MISSION ACCOMPLISHED!


Day 6 is just around the corner!

7 Day Spring Cleaning Challenge – Day 2

 Day Two: Bathrooms

  •  Start with deep problem areas such as mold or stains. Clean with Clorox or a strong cleaner to remove tough places.  Some cleaners may need to sit for awhile to be effective. 
  • Do a “DO I USE IT-RUN THROUGH.” Look at medications, lotions, soaps, beauty products, etc…even magazines and discard anything that is expired or  have not used in over a year.
  • Take out all trash.
  • Remove all laundry and any towels, washcloths, rugs and linens that need to be cleaned. Replace with clean linens, and refill toilet paper and tissues.
  • Showers: Run hot water for a few minutes to help loosen any tough areas. Then clean as usual.  Clean shower heads as well to allow the best flow. May need to replace shower liner or squeegee if glass shower.
  • Tubs: allow cleaner to sit for 1-2 minutes then clean as usual. May need to use a sponge with a abrasive side for rings.
  • Toilets: allow cleaner to sit for 3- minutes, then clean with a toilet brush. If there are tough stains you could use an abrasive cleaner or a pumice stone for those areas. KEEP STONE WET to decrease the chance of scratches. (You can also use a Clorox drop in to help the toilet stay clean longer.)
  • Dust any area that may need dusting. Including lights, vents, and the corners of the room.
  • Clean mirrors, sinks and countertops. Microfiber cloths are great. You can also use white cloths or cloth diapers for great results.
  • Use Windex for any silver/chrome areas for a finishing shine.
  • Once all areas are cleaned…declutter underneath the sinks, drawers, towel closets and other areas that have a closed door. Clean and replace items still needed or used.
  • Clean floors and baseboards.
  • Place all items back in their normal places. Lay out fresh hand towels and refill soaps. Replace any light bulbs and candles with a scent for the season.
  • Continue with all bathrooms until all bathrooms are completed.

Senses that are great for bathrooms:  Clean linen, lemon, cucumber, and juniper.

(For great items to add to your bathroom….click on my Father in laws site called, SCENTSY and place your order for the best aroma’s in your home.)

7 Day Spring Cleaning Challenge-Day One

Each day will be a time of concentration of cleaning deeply in detail, so that the next cleaning will be less stressful. You may want to start with de-cluttering so that there is not as much to clean, and then re-organize after the deep clean.

You may do the days in any order but try to at least accomplish 2 or more days in a row.

Day One: Spruce up your Bedroom!

Why start here? Because after your first day of cleaning you will want to rest in a place of comfort and your bedroom should be that place!

  • Open up the windows to allow fresh air.
  • Take all the linens and dirty towels to the laundry room and start the washer.
  • Remove all trash and items that do not belong in the room.
  • Take a broom and sweep out any cobwebs in the corners of the room etc…
  • Dust from top to bottom, left to right. Including vents, ceiling fans, blinds/shades, windowsills, pictures, lamps etc…
  • Polish all furniture. Knickknacks  and other items of wood.
  • Clean any mirrors, frames, lights, and items not cleaned.
  • Turn your mattress over.
  • Take rugs, mats and comforters outside and shake them out.  Some you can wash and dry so those need to be taken to the washer. Take the linens and towels that you started out of the washer, put them into the dryer and start the mats or comforters.
  • Clean out under your bed….then sweep, mop or vacuum under your bed.
  • Put all items back in place.
  • Make bed with fresh linens. Put comforter and/or mats in dryer.
  • Clean base boards.
  • Sweep, mop or vacuum rest of floors.
  • Place comforter and mats in proper places.
  • Close windows and burn your favorite candle. Like a lavender scent. (Scentsy Candles are awesome-Click on the link and see what is good for you.)

This basic method can be used for most bedrooms and be adjusted accordingly. Complete all bedrooms!

Once all bedrooms are deep cleaned, RELAX!  Enjoy your place of rest!

Moving on to day TWO!

Spring Cleaning-Lets go!

Need help getting started? Here are the top 2 things that will get things going!

  • Make a plan of action
  1. Decide what you want to do and make a list.
  2. Decide what order you want to do the things listed.
  3. Male a list of things you will need…cleaning supplies, bins, tools, trash bags, etc…
  4. Decide on a day, time and time limit.
  5. Decide on a reward.
  6. Have a family discussion so that everyone can be on the same page. See how they can help and possibly learn a new life skill.
  7. Clear the items not necessary.
  8. Remove trash and items that are broken.
  • Gather your supplies!
  1. All cleaners, including rags, paper towels, micro-rags, and dusters.
  2. Gather tools-vacuum cleaner, mop, broom and duster
  3. Bags/bins..trash bags, assorted zip locks bags, assorted storage bins and labels.

One area at a time!

One room at a time!

Once project at a time!

Get started and know that every time you Spring Clean you refresh and renew your home!

Good Luck~

Basic New Year Cleaning

Starting the New Year can be Challenging  when it comes to Cleaning, But if you have a Cleaning Schedule, you can have “Less Stress From Cleaning the Mess.”

Start with Creating a Cleaning Schedule just for your family….here is how!

Creating a cleaning schedule can be a confusing job. How often do cleaning tasks need to be performed? How long does a particular job take? What chores are considered daily, weekly, monthly, or seasonal tasks? The truth is that no one schedule will work perfectly for the same two people. If your home has small children, you may find that weekly tasks need to be performed daily to prevent getting behind. If you live alone, some daily tasks may only need to be done weekly. Allergy sufferers and people with breathing issues may need to perform certain tasks on a more frequent basis. Use the following guidelines as a starting point to developing your own daily, weekly, monthly, and seasonal cleaning schedule.

Daily Cleaning Chores

Daily cleaning chores are the absolute minimum that must be done on a daily basis to keep a home clean. Depending on the type of household you live in, some of these chores may even need to be done more than once during a day.

Weekly Cleaning Chores

Although most of these chores don’t require daily work, they are still some of the most important tasks that need to be done in our homes. Some items may need to be completed more often. Scheduling these chores in addition to your daily chores will help you maintain order and cleanliness in your home.

Monthly Cleaning Chores

Monthly cleaning chores are my favorite weekend chores. These are areas of your home that can afford to be neglected during your daily and weekly cleaning sessions, but ultimately a good thorough monthly cleaning is needed.

Seasonal Cleaning Chores

Although seasonal cleaning chores are important, they are usually the most forgotten parts of home maintenance. Our attention is only needed in these areas two to three times a year, but it is vital to maintaining and cleaning our homes.